Quantcast
Channel: Matt Huisman
Viewing all 192 articles
Browse latest View live

[How To] Batocera & KODI Dual Boot

$
0
0


Here is my easy how-to for building a multi-boot Batocera & KODI system.
You can also install any other systems as well (eg. Raspbian) & easily boot to them from KODI.

It is compatible with all versions of the Raspberry Pi.
An internet connection is required on the Pi.


How to Install

Step 1

Follow THIS post to install NOOBS Lite Extra to your SD card.

Step 2

Power on the Pi.
NOOBS will load and then give you a list of OS's to install.


You can select any combination of systems you like.

For KODI, you can choose either LibreELEC or OSMC (or both).
Then select Batocera & any other systems you want.
Above I have chosen Raspbian + LibreELEC + Batocera

Once you have selected your systems, simply press i or click Install.

NOOBS will now download and install your chosen systems.
This can take a bit of time depending on how many systems you are installing.

Wait for it to complete, and then move on to step 3.

Step 3

Follow THIS post to install my NOOBS Companion Add-on in KODI.

Step 4

Let's now make Batocera able to boot-back into our KODI system.

Go to the main menu.
Scroll down to Add-ons.
Select the "NOOBS Companion" add-on.

Move down to the Batocera system.
Open the context menu and select "Install Boot-Back"


Batocera has now been modified to "Boot-Back" into our KODI system (instead of it's own).


Watch the video on the NOOBS Companion post for more things you can do with it!

Enjoy :)


Optional Tweaks

Tweak #1
If you would like to store your Batocera Roms on a shared network folder, see HERE

Tweak #2
If your using LibreELEC and want to remove all the extra sources in File manager, see HERE


Troubleshooting

Issue:NOOBS Companion add-on is removed from KODI.
Solution: Redo Step 3 from above.

Issue: Batocera no longer boots back into our KODI system (eg. after an update)
Solution: Redo Step 4 from above.


More Info


Changelog

10/04/17
- Initial post

Thanks to the teams at Raspberry Pi, KODI, LibreELEC, OSMC, PINN & Batocera

[Coming Soon] ElectricKiwi.co.nz Android App

$
0
0

My next project will be writing a simple Android App to allow updating the ElectricKiwi Hour of Power easily from your Android smartphone.

It will simply store your login credentials.
I will use some basic Java encryption so the app stores the encrypted password (not plain text).
It then will unencrypt and send to ElectricKiwi via HTTPS when logging in.

They do not provide an API so it will be done the "old fashion way".
It will scrape your currently set hour and allow changing to a new hour.
It will also have option to send a reminder notification when your hour is about to begin.

Future versions may include scheduling different hours for different days.
eg. 2pm in weekends, 9pm during the week.


I have no experience with the Playstore app submission process, so will be a good learning experience.

I'm not sure if anyone will actually use it, but it will be handy for my partner and I.

This post will be updated when it is released.

Sharing PHP session id between different domains

$
0
0
In this post we will create a basic system for sharing a session id between multiple domains.
This allows for single sign on / cart sharing etc.


The way we accomplish this is by loading a small image from the other domains. The URL to this image will contain our session id so the other site can retrieve this and set it's session_id to match.

Note: This will only work if the sites all share the same session storage.

There are only 2x files required.
All the sites will contain the same 2x files.

The first will create the image links containing the session ID, and the second will retrieve this session id, change it's id to match and then show a tiny blank image.

test.php
<?php
$sites = array('www.site1.com', 'www.site2.com');

session_start();
if (!isset($_SESSION['sso_sites'])) {
    foreach($sites as $site) {
        if ($site != $_SERVER['HTTP_HOST']) {
            $_SESSION['sso_sites'][] = $site;
        }
    }
}
?>

<html>
<head></head>

<body>
My Session ID: <?php echo(session_id()); ?>

<?php
foreach ($_SESSION['sso_sites'] as $site) {
    $url = sprintf('http://%s/sso.php?i=%s', $site, session_id());
    echo('<img src="'.$url.'" style="border:0;" alt=""/>');
}
?>

</body>
</html>

You will need to change the $sites array to match the sites you want to have all share the same session_id.

We set  a session variable to hold all the sites that need their session_id changed. Once they have changed, they will then remove themselves from this array and therefore no image will be loaded for them.

sso.php
<?php
session_start();

$session_id = trim($_GET['i']);
if ($session_id != session_id()) {
    session_destroy();
    session_id($session_id);
    session_start();
}

if (isset($_SESSION['sso_sites'])) {
    if (($key = array_search($_SERVER['HTTP_HOST'], $_SESSION['sso_sites'])) !== false) {
        unset($_SESSION['sso_sites'][$key]);
    }
}

header('Content-Type: image/gif');
echo base64_decode('R0lGODlhAQABAJAAAP8AAAAAACH5BAUQAAAALAAAAAABAAEAAAICBAEAOw==');

This code simply retrieves the session id, checks if it is different to it's current session_id and then set's it if it is.

Once we are using the same session data, we can remove our site from 'sso_sites' so it no longer will be set.

Finally it outputs a tiny blank 1px by 1px image to keep the browser happy.

If you upload this code to each site and visit www.site1.com/test.php and see it give you your session id. Now, if you visit www.site2.com/test.php you should also see it give you the same session id.

Congrats, both sites are now using the same session data :)

Note: There is no security considerations in this code.

[Coming Soon] ElectricKiwi.co.nz Android App

$
0
0

My next project will be writing a simple Android App to allow updating the ElectricKiwi Hour of Power easily from your Android smartphone.

It will simply store your login credentials.
I will use some basic Java encryption so the app stores the encrypted password (not plain text).
It then will unencrypt and send to ElectricKiwi via HTTPS when logging in.

They do not provide an API so it will be done the "old fashion way".
It will scrape your currently set hour and allow changing to a new hour.
It will also have option to send a reminder notification when your hour is about to begin.

Future versions may include scheduling different hours for different days.
eg. 2pm in weekends, 9pm during the week.


I have no experience with the Playstore app submission process, so will be a good learning experience.

I'm not sure if anyone will actually use it, but it will be handy for my partner and I.

This post will be updated when it is released.

[How-to] Tvheadend NZ Radio Station Setup (using Internet Streams)

$
0
0
(Video coming soon)

Current Stations

  • RDU
  • Radio Live (96k)
  • ZM (64k)
  • Mai FM (128k)
  • George FM (128k)
  • Radio Sport
  • Radio NZ Concert (64k)
  • The Cheese (128k)
  • The Breeze (128k)
  • BASE FM (40k)
  • The Edge (160k)
  • More FM (128k)
  • The Coast (64k)
  • Newstalk ZB
  • Radio NZ National (64k)
  • The Sound (64k)
  • The Hits
  • The Rock (128k)
  • Radio Hauraki

How-to

Navigation to TvHeadend -> Configuration -> DVB Inputs -> Networks
Click Add
Select "IPTV Automatic Network"


Fill in below two fields

Network Name: Radio
URL: http://files.matthuisman.nz/nzradio.m3u8

Click "Create".


Navigate to Muxes
Every radio station get's it's own MUX and you will see them being scanned in
Once they all show "OK", move on to the next step.


Navigate to "Services"
Click on Network column to sort all the "Radio" network items to the top
Highlight all the Radio items and select "Map Selected" -> "Map Selected Services"


Make sure "Create type-based tags" is selected and then select "Map Services"


Once the mapping is completed, navigate to Configuration -> Channel / EPG -> Channels
You will see all your new radio channels listed.
You can now edit them as you please (Rename, give channel numbers, delete)


They will appear in KODI under  a new "Radio" main menu item.
You can record them etc, just like you would with a normal Tvheadend channel.


Enjoy!

Feel free to request other stations in the comments below.
Also let me know if you find any higher quality streams.

Note:
The streams require ffmpeg to be installed on the device running Tvheadend.
I have tested these working when using LibreELEC Tvheadend server.


Coming Soon:
Tvheadend NZ Freeview Setup (using Internet Streams)

[Release] NZ Radio KODI Add-on

$
0
0


If your using a Tvheadend server, check out THIS post for a method using the Tvheadend back-end instead.

How-to Install

First follow THIS post to install my KODI Add-on Repository.

Now navigate to "Main Menu -> Add-ons -> My Add-ons"
Select ".." then select "Install from repository"
Select "MattHuisman.nz Repository".
Select "Music add-ons" then "NZ Radio"

Select "Install" and the add-on will download and install.


You can now access the add-on in the Add-ons main menu item.


Click into the add-on and you can now navigate to your favorite NZ Radio stations.


Simply now click the radio station to play!

The add-on is still in very early stages so please be patient with it.

Feel free to request other stations in the comments below.
Also let me know if you find any higher quality streams.

Enjoy!

[Release] NOOBS / PINN System Sizing Web App

$
0
0
Here is a new web app I have created to allow users to easily set NOOBS / PINN system sizes.

http://noobs.matthuisman.nz/

Feedback is welcome :)

Screenshots

----------------------------------------------------------------------
----------------------------------------------------------------------

[How To] Recalbox Network (Samba) Roms Folder

$
0
0
Here is my technique for having the Recalbox roms folder mounted on the network.
This allows for all yours roms to be on the network and every Recalbox can access them.

 There were a few obstacles

1) Emulation station is booted before the network is up to reduce boot times
2) If we change any of the existing init.d files - our changes will be overwritten on updates
3) fstab won't work either

Our solution is to create a custom.sh script that Emulationstation will run on boot.

Please note: This method requires at least Recalbox 4.0.0-beta4

Let's get started.

First boot the Raspberry Pi into Recalbox.

Now we need to SSH into Recalbox.
We do this using a program called Putty on a Windows computer that is on the same network as the Pi.

Download putty.exe from here

Save it somewhere you can easily find it.
It's portable - which means it doesn't need to be installed.
Open the downloaded putty.exe to start Putty.

Enter the Pi's IP address in the host name field and make sure the port is 22.
(Often you can find the IP by looking at the DHCP client list in your router settings page.)
Then click Open.


You should see "login as:" appear.
Type root and hit enter. Now type in the password recalboxrootand hit enter.

You should now be logged into the Pi remotely.
Now, you can copy the below commands into the terminal window.

First, we need to change the filesystem from RO (read only) to RW (read / write).
mount -o remount,rw /
Now we need to mount our network folder and copy over all the files.
mkdir /tmp/share
mount -t cifs -o user={USER},password={PASS},rw //{IP}/{SHARE} /tmp/share
If your share is public and doesn't require username / password, then use the below
mount -t cifs -o user=guest,rw //{IP}/{SHARE} /tmp/share
Replace {IP} with the IP address of your share & replace {SHARE} with the name of the share.
If required, replace {USER} and {PASS} to what is required for your share.
Note: It appears Recalbox requires write (rw) permission to the network share.

We now need to copy over all the files from the existing roms folder to our new roms folder
cp -r /recalbox/share/roms/. /tmp/share/
Now unmount this share
umount -l /tmp/share
Now let's create our custom.sh script
nano /recalbox/share/system/custom.sh
Copy the below text into the editor
#!/bin/sh

case "$1" in
start)
  while ! ping -c 1 -W 1 {IP}; do
sleep 1
done

  mount -t cifs -o user={USER},password={PASS},rw \
//{IP}/{SHARE} /recalbox/share/roms

  /etc/init.d/S*emulationstation restart
  ;;
stop)
  umount -l /recalbox/share/roms
  ;;
esac

exit $?
Remember to change {IP}, {SHARE}, {USER} and {PASS} to match your setup  :)

Save the file (CTRL-X, Y, ENTER)

Now make sure the script is executable
chmod +x /recalbox/share/system/custom.sh
Now reboot.
reboot
Recalbox will boot and initially show the 'internal' roms.
This is because Emulation Station starts before the network and our script :(

Once the network is started our script will then run, mount the network roms folder and restart Emulation Station to display the network roms.

I also advise making a backup of your working custom.sh file.
Just in case the file is deleted during updates (shouldn't happen though).

Building a Raspberry Pi IOT Garage Door Opener - Part 5 (Android App)

$
0
0

--------------------------------------------------------

Download the Android App HERE
or download the source here

-------------------------------------------------------

First you will need to go into your Android Settings -> Security and enable 'Unknown Sources' .


Now go ahead and install the app (.apk).
Either email the .apk to your phone or transfer it using a USB cable.
Once you have the file on your phone, you can just click it in the File Manager to install
Click Install.


Once installed, start the app.
Once you are in the app click the small cog at the top.


In the text box, enter the URL to your garage door API open command.
The default is http://192.168.2.254:8080/activate


Once you have set your correct URL, click OK to save it.
Now you can simply press the button to Open / Close your garage.


The app will show you the response it get's from the API.
If everything goes good, you should see 'OK' and the garage should open  / close.

And that's it!

This app could be installed on as many phones as you like!

P.S: I am no Android developer so please excuse the basic look and source code.

I hope you enjoyed these posts on making your very own IOT Garage Door Opener.

RugbyPass.com (Discount code & Free Smart DNS)

$
0
0

Here is a 25% off code to use at RugbyPass.com

reddit

With the above code I paid $14.99 USD (approx $21 kiwi) for a months access.

To sign up and to watch streams you will need to be in the supported Asian countries.
With a bit of DNS magic you can appear in these supported countries.

I have had reports of Getflix and dns4me both working well.

Additionally, I have spun up a Free Smart DNS Proxy which also works.

You can get the IP address for this DNS proxy below:

http://files.matthuisman.nz/dns.php

Set your device / routers Primary DNS to that IP.
Then set the secondary DNS to your usual Primary DNS (eg. 8.8.8.8 for Google DNS).
Then reset the device to flush the existing DNS cache.

I will keep this free server up for the Lions Tour.

I suggest signing up and paying via PayPal.
This allows easily canceling your subscription via PayPal (otherwise you need to email them).

If you find this helpful, please consider shouting me a coffee!

Enjoy!

Go the All Blacks!

ElectricKiwi Referral Link (Get $50 credit)

GeekZone? More like End-User-Support-Zone

$
0
0

I just got "kicked" off Geekzone for what I guess was "winding up the mods" (No warning or explanation).
https://www.geekzone.co.nz/forums.asp?forumid=4&topicid=215296
(My "final post" on the 2nd page)

Anyway, at least I don't need to bite my tongue any more.
Time for a rant...

This is what NZ has for a tech forum is really quite concerning....
It doesn't even have <code> tags!
And don't even try using it on a phone.
WHAT THE HELL?

It really does feel like it was made in 2005 and hasn't changed since.


I didn't see many (if any) other users post actual code or even terminal commands.
It's mostly Windows end users asking for support to fix their ISP provided emails (ewww).

Most solutions given to users cost large $$$ and are off-the-shelf.
A "change your needs to suit the system" vs "create a system to suit your needs" attitude.
The "do it yourself" advert comes to mind.

No wonder I never saw any young ones asking for help making their LED blink or Scratch character jump. They would be told to buy M$ something, program it with M$ something else, and then accept that it only blinks once every leap year.

They will end up spending their life times worth of pocket money and left with a leap year indicator.


The worst part is a lot of them call themselves "Systems Architects".
What a joke. Using .NET for everything is not architecture.
I true architect would know the latest technologies.


Also, the mods don't seem to actually moderate.

The amount of users posting raw logs and quotes of quotes 10x "inception" layers deep plague the forums. Scrolling entire pages for replies is common place.

The only moderation I saw was when I got banned for suggesting a possible solution for a users issue instead of the usual "pay $25".

I come to your site, view your ads, click your affiliation links and then provide it with content.
Then you ask me to pay $25 a year...

Sorry, what am I getting out of this?
And the mod questions why I link to my own blog?
Maybe because you can't edit your bloody posts!
If he had ever provided a good tutorial / how-to
 - he might know editing it to keep it up-to date is pretty crucial.

But no one says anything - because a$$ kissing is rule #1.


With the rise of IOT, SBC's (in schools etc), open-source and the maker / hacker communities - it's only a matter of time before the next generation builds something better (which would take all of about 3 hours).

Geekzone will still have it's place though....
    - over 80's will always need help to Skype their grand-kids.


[Release] NZ Freeview KODI Add-on

$
0
0

If you require a guide, then see my new post HERE

How-to Install

First follow THIS post to install my KODI Add-on Repository.

Now navigate to "Main Menu -> Add-ons -> My Add-ons"
Select ".." then select "Install from repository"
Select "MattHuisman.nz Repository".
Select "Video add-ons" then "NZ Freeview"

Select "Install" and the add-on will download and install.


You can now access the add-on in the Add-ons main menu item.


Click into the add-on and you can now navigate to your favorite NZ Freeview Channels.


Now simply click the channel to play!

The add-on is still in it's early stages so please be patient with it.

Enjoy!

[How to] Simple KODI Freeview NZ IPTV Setup (with full guide)

$
0
0


How-to Install

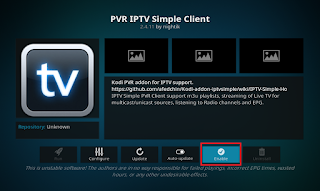
From the KODI Main Menu, navigate to Add-ons -> My Addons -> PVR Clients.
Scroll down to PVR IPTV Simple Client and select it.


Note:
If you do not have the "PVR Clients" menu or the "PVR IPTV Simple Client" listed:
Navigate to Add-ons -> Add-on Browser -> Install from Repository -> All Repositories -> PVR Clients -> PVR IPTV Simple Client. 

Then click Install. Then continue with the below steps.

Now select "Configure".


Under "General", set the "M3U Playlist URL" to: http://files.matthuisman.nz/nziptv.m3u8


Move to "EPG Settings" and set "XMLTV URL" to: http://files.matthuisman.nz/freeview.xml


Move to "Channel Logos" and set "Channel Logos from XMLTV" to: Prefer XMLTV


Then select "OK".

Now simply Enable the add-on.
(If the add-on is already enabled, disable it, and then re-enable it)


You should see the channels scanning in and now have a "TV" and "Radio" main menu items.


You can not use full PVR features with this particular PVR back-end.
It's just an easy way to get IPTV streams and guide support into KODI.

For full PVR features (recording etc), you will need to use another back-end (eg. TvHeadend).
A guide for this will be coming soon.

Enjoy!

[How to] Tvheadend NZ Freeview IPTV Setup

$
0
0

How-to setup your Tvheadend PVR back-end for NZ Freeview IPTV streams and full TV guide support.

No DVB-T tuners required!


URLs

  1. http://files.matthuisman.nz/tv_grab_nz-py
  2. http://files.matthuisman.nz/nztv.m3u8

[Donations] Thank you!

$
0
0

Just a quick post to thank everyone who has donated lately!
I removed ads from the blog about a week ago and donations have increased which is awesome.

I personally don't mind good non-intrusive relevant ads.
I quite often see sales on at websites I frequent which I would otherwise not know about.

However, if I can keep ad's off the blog - then everyone wins!
Ads also increase page load times - which is not cool.

I do this in my spare time because I enjoy it and often use most of it myself.
But if I can get some donations to help pay my PSN account or RugbyPass each month - then YAH!


Thank you!

[How to] LibreELEC TvHeadend IPTV Setup for Freeview NZ (with PVR)

$
0
0

How-to setup a LibreELEC Tvheadend IPTV server for Freeview NZ with full TV guide support, Radio, recording and multiple KODI clients.

No DVB-T tuner required!


URLs

  1. http://files.matthuisman.nz/freeview.xml
  2. http://files.matthuisman.nz/nztv.m3u8
  3. http://files.matthuisman.nz/nzradio.m3u8


If any "FAIL" to scan, then try re-scanning them:
Select item, click "Edit"& change 
"Scan status" to "PEND". 


This will queue up a re-scan.
If it continues to fail after a few tries, please let me know in the comments below.

Note:
The streams require ffmpeg to be installed on the device running Tvheadend.


Enjoy!

HG659 Router | Python Reboot Code

$
0
0

Here is some quick code to allow programmatically rebooting your HG659 router.
This is quite a common router here in New Zealand with Spark, Vodafone, and other ISPs using it.

I have tested this working on a HG659 running Telecom Business firmware (V100R001C227B011).
Hopefully it also works fine on other firmwares.

The code first gets a CSRF token, then logs in, and then reboots.
You could easily adapt it to fetch info from the admin interface etc.

It works in Python 2 and Python 3.
2x Python libraries (Beautiful Soup and Requests) are required, these can easily be installed via pip.
pip install bs4 requests
The code can be found HERE
You will need to change the top three config variables (lines 8-10) to match your setup.


If you don't want your password stored in plain text:
  1. Set your plain text password (line 10)
  2. Un-comment lines 16 & 17
  3. Run the script
  4. Copy the outputted hash value
  5. Paste the hash value into line 17 (between the quotes)
  6. Comment out lines 14-16
  7. Remove your plain text password (line 10)
  8. Save changes and run
After the modifications, is should look something like this:


Enjoy!

[How To] Lakka & KODI Dual Boot

$
0
0


Here is my easy how-to for building a multi-boot Lakka& KODI system.
You can also install any other systems as well (eg. Raspbian) & easily boot to them from KODI.

It is compatible with all versions of the Raspberry Pi.
An internet connection is required on the Pi.

How to Install

Step 1

Follow THIS post to install PINN Lite.

Step 2

Power on the Pi.
PINN will load and then give you a list of OS's to install.


You can select any combination of systems you like.

For KODI, you can choose either LibreELEC or OSMC (or both).
Then select Lakka & any other systems you want.
Above I have chosen Raspbian + LibreELEC + Lakka

Once you have selected your systems, simply press i or click Install.

PINN will now download and install your chosen systems.
This can take a bit of time depending on how many systems you are installing.

Wait for it to complete, and then move on to step 3.

Step 3

Follow THIS post to install my NOOBS Companion Add-on in KODI.

Step 4

Let's now make Lakka able to boot back into our KODI system.

Go to the main menu.
Scroll down to Add-ons.
Select the "NOOBS Companion" add-on.

Move down to the Lakka system.
Open the context menu and select "Install Boot-Back"


Lakka has now been modified to "Boot-Back" into our KODI system when it exits.


Watch the video on the NOOBS Companion post for more things you can do with it!

Enjoy :)


Optional Tweaks

Tweak #1
If you would like to store your Lakka Roms on a shared network folder, see HERE

Tweak #2
If your using LibreELEC and want to remove all the extra sources in File manager, see HERE


Troubleshooting

Issue:NOOBS Companion add-on is removed from KODI.
Solution: Redo Step 3 from above.

Issue: Lakka no longer boots back into our KODI system (eg. after an update)
Solution: Redo Step 4 from above.


Changelog

02/03/17
- Change the entire method to use my brand new NOOBS Companion Add-on.

Thanks to the teams at Raspberry Pi, KODI, LibreELEC, OSMC, PINN & Lakka

[Release] Updated NZ IPTV Files

$
0
0

I have updated my IPTV generator script to output a few more types of m3u8 files that should be compatible with a greater range of devices & software.

If you have been previously using my older urls, please update to the new urls below.
I have redirected the old urls to the new files so existing systems shouldn't break.
I will keep these redirects up for a few months to allow for switching.
I have updated all previous blog posts to use the new urls.

You can view the currently available TV Channels & Radio Stations HERE.

Raw

These m3us files are made to be used with any device / program that does not have it's own files below.
They don't pipe any streams and don't add any extra headers etc.

KODI

These m3u8 files are made to be used with KODI and IPTV Simple Client add-on.
They are very similar to the raw files, except they add a X_FORWARD header for region locked streams.

TvHeadend

These m3u8 files are made to be imported into Tvheadend as an IPTV Automatic Network.
All the streams are piped to ffmpeg to re-container them as MPEG-TS.


Therefore, they rely on ffmpeg being installed on the system running Tvheadend and that it's path is /usr/bin/ffmpeg (symlink if different).

If you don't have ffmpeg, you could try using the above RAW files instead - but you may find quite a few streams will not work without being piped through ffmpeg.

JSON

These files simply contain the stream information in a nice JSON formatted file.
My NZ Freeview& NZ Radio KODI add-ons use these files for their data.

EPG

All above files use my unique channel identifications.
This allows them to work with my below EPG files.
These are full 7 day EPG files for all Freeview channels.

All streams are scraped and checked nightly for maximum reliability.
Where possible, the channels API's are used to help reduce risk of outdated streams.
The highest bit-rate streams are used.

I am automatically notified of any failed streams.
It is best to pull the files on or after 2:00 am (as they are generated around 1:30am).


If you find yourself using any of these files, please consider shouting me a coffee.

Enjoy!
Viewing all 192 articles
Browse latest View live


<script src="https://jsc.adskeeper.com/r/s/rssing.com.1596347.js" async> </script>